DIY: chic and affordable children’s artwork…

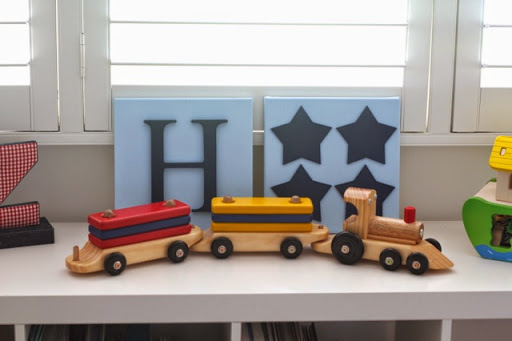
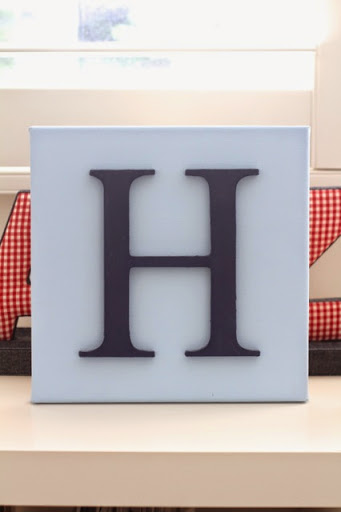
I made these when I was pregnant with E. I looked around on the web and couldn’t find exactly what I wanted (an initial on a canvas) and what I did find wasn’t quite right or not in the right colours. So, I decided to make my own and this is what the finished product looks like…

Cheap and Chic homemade children's artwork... Cheap and Chic homemade children's artwork... Cheap and Chic homemade children's artwork... Cheap and Chic homemade children's artwork... Cheap and Chic homemade children's artwork... Cheap and Chic homemade children's artwork...
I bought my supplies at Eckersley’s and Spotlight. I have provided links below for each item you need for the project.
To make these you will need…

  • Canvas
  • Letter or any other decorative item. More letter’s here
  • Paint – minimum of two colours – one for the canvas and one for the initial / decorative item. You could use as many colours as you want if you want a rainbow effect or just something more colourful. The sky is the limit. I used acrylic paint but I think any paint would do. Depending on how many you are doing you won’t need much. Some more options here and here.
  • Glue
  1. Paint the canvas – I gave it a base white coat (in hind sight I don’t think this is necessary) and then two coats of colour. Allow it to dry in between coats. Most paints come with instructions of time recommended left between coats.
  2. Paint the letter – I gave it at least two coats. Just judge for yourself what the coverage is like and stop when you are happy.
  3. When everything is dry line the initial up on your canvas where you would like it and very lightly with a pencil mark some small guidelines.
  4. Put glue on the back of your letter and place it carefully on the canvas being sure to look for your guidelines. apply some pressure for a little while to make sure the glue bonds.
  5. You’re all set to hang or place around your child’s room.

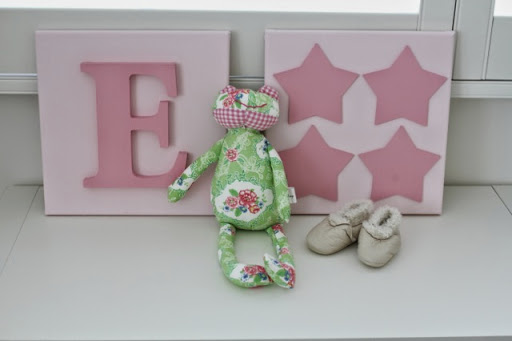
You could also do smaller versions, larger versions, fluro or glitter versions. Really the only limit is your imagination and your decor aesthetic.

I hope you have fun with this…

Have you made your own artwork before? Ever made something similar?

Jx

Easy kids craft – treasure chest…

We made this a few weeks ago and H is still into it. It is a treasure chest. Harry found the shoe box as I was preparing to throw it out and was calling it a treasure chest (they did an under the sea project at kindy earlier this year and as a class made a treasure chest)

I decided to help him decorate it and turn it into his own design treasure chest…

I thought I would blog it in case any other parent out there is looking for a easy and cheap craft project. Especially with the wet weather we’ve had it’s a great project for those days…

What you’ll need….

  • A shoe box – preferably one that has the lid attached
  • A4 paper
  • Scissors
  • Sticky tape
  • Markers
  • Stickers
  • Any other decorating items you can think of. For example… ribbon, buttons, paint, felt, glitter, glue
In this instance I just covered every surface I could with plain white paper. Using sticky tape to attach it and cutting it down where needed. 
Once that was done I gave Harry his markers and he went to town colouring and decorating.

Later that day I was at a shop and saw the pirate and toy story stickers… two things he is particularly into at the moment and brought them home. He loved them and with some help took great pleasure in decorating his treasure chest.
As you can see it’s still getting lots of use and he is still very interested in it to store all his ‘treasures’
The next thing we will be doing is a pirate’s spy glass… I just have to finish the paper towel roll!!…
I know it’s very simple and to some of you probably very obvious but it’s a fun, cheap and easy project to do with your little one and something they can make their own.
Ever made a treasure chest?…
I would love to hear about other craft ideas…
Jx